Section IV: Reassemble
| Replace Relay Panel |
|---|
| | |
| No. | Procedure | Instructions |
|---|
| 1 | Replace rear of panel | Replace rear of relay panel by sliding the relay panel into the guides of the plastic housing until retaining tab locks into place. |
| 2 | Attach relay box housing | Tighten 10mm retaining nut. |
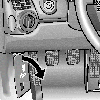
| Replace Fuse Panel |
|---|
 | | |
| No. | Procedure | Instructions |
|---|
| 1 | Replace rear of panel | Replace rear of fuse panel by attaching back half of plastic housing until tabs snap into place. |
| 2 | Attach fuse box housing | Push tabs from footwell holes and tighten retaining screw. |
| 3 | Replace carpeted fuse box panel | Replace carpeted cover and tighten 4 phillips fastening screws. |
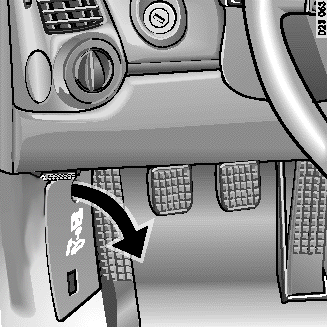
| 4 | Replace fuse box cover | Push the fuse box cover into place. The square opening should align with the spoiler switch. |
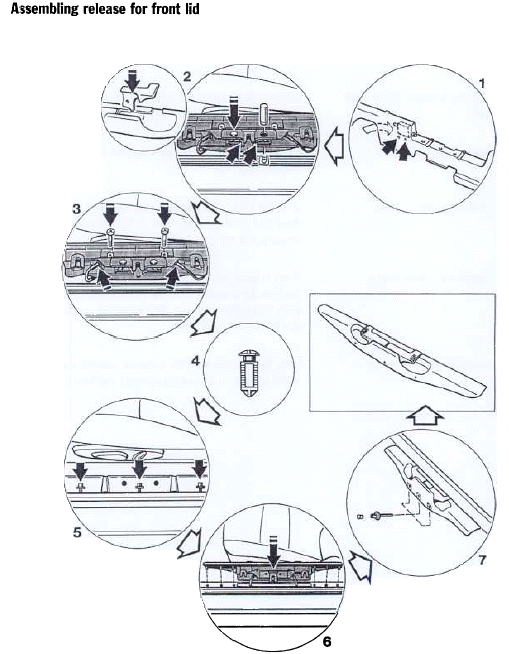
| Assembling Release for Lid |
|---|
 | | |
| No. | Procedure | Instructions |
|---|
| 1 | Screwing in hexagon socket head bolts. | The M6 x 25 hexagon socket head bolts -5-in the support must not be screwed in by more than 3 to 4 turns. |
| 2 | Fitting sill cover. | Position the sill cover -6- and push it onto the support. |
| 3 | Tightening hexagon socket head screws. | Tighten the M6 x 25 hexagon socket head screws -7- in the support through the holes in the sill cover. Press in the 8.0 x 11 x 7.2 plugs. |
| Note: From model year 2001 varies due to electrical actuating switches. |
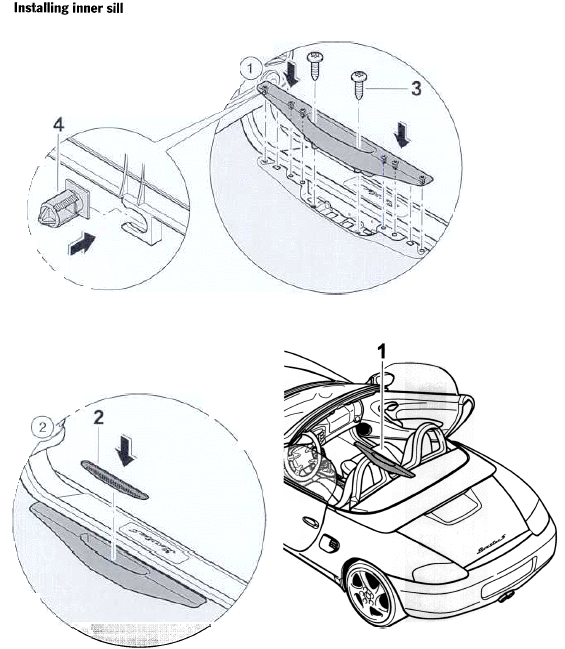
| Installing Inner Door Sill (passenger) |
|---|
 | | |
| No. | Procedure | Instructions |
|---|
| 1 | Installing sill | Clip in new fastening clips -4- if necessary. Insert sill -1- downward into the lower support and engage. |
| 2 | Fastening the sill | Screw in fastening screws -3- and lay rubber mat -2- into the oddments tray. |
| Replacing Gear Shift Mechanism |
|---|
 | Reposition the gear shift mechanism and tighten the fastening nuts that retain it. Be conscious of where your wires run underneath. |
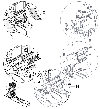
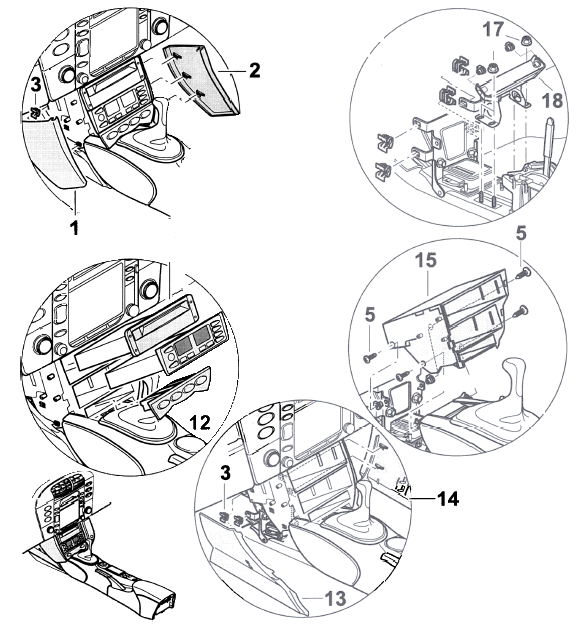
| Install Center Console (Front Section) |
|---|
 | | |
| No. | Procedure | Instructions |
|---|
| 1 | Main console | Replace main console body. Make sure that your power window and heated seat switches exit through the opening in the body. |
| 2 | Metal support bracket | Insert the black metal support bracket -18- and tighten fastening nuts -17-. |
| 3 | Center console (front section) | Insert the front of the center console -15- and tighten fastening screws -5-. |
| 4 | Right cover | Snap the right cover -14- into clips -3-. |
| 5 | Left cover | Snap the left cover -13- into clips -3-. |
| 6 | Front trim | Clip the front trim -12- into place (connect the plug connections of the rocker switch if occupied). |
| 7 | Cover, front right | Snap the front right cover -2- into clips -3-. |
| 8 | Cover, front left | Snap the front left cover -1- into clips -3-. |
 Note: Additional steps are necessary if navigation unit CD drive and/or heating/air conditioning control is located in lower two slots of center console (front section) in place of oddments trays. Note: Additional steps are necessary if navigation unit CD drive and/or heating/air conditioning control is located in lower two slots of center console (front section) in place of oddments trays. |
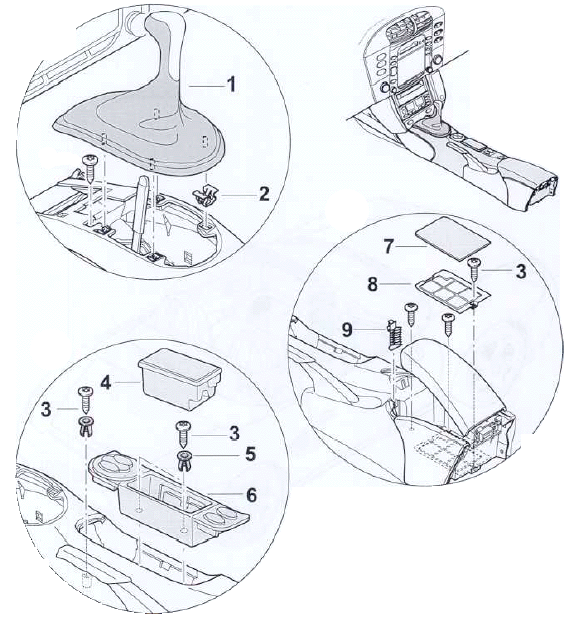
| Replacing Center Console |
|---|
 | | |
| No. | Procedure | Instructions |
|---|
| 1 | Coin box | Replace the fastening screw -3- underneath coin box. Clip the coin box -9- in. |
| 2 | Floor oddments tray | Tighten the fastening screw -3- from the floor oddments tray -8-. |
| 3 | Rubber insert | Replace rubber insert -7-. |
| 4 | Heated seat switches | Remove two oval blanks from ashtray bracket. Snap in heated seat switches. |
| 5 | Ashtray retaining bracket | Connect the electrical plug connections. Snap the ashtray retaining bracket -6- into the center console. |
| 6 | Expanding nut | Insert expanding nuts. -5-. |
| 7 | Fastening screws | Fasten T27 Torx fastening screws -3-. |
| 8 | Ashtray insert | Press in ashtray insert (or non-smoker rubber mat) |
| 9 | Shift lever knob | Push the shift lever knob -1- on. Engage the clips -2- all the way round. (Some shift lever knobs require the removal of a small allen screw) |
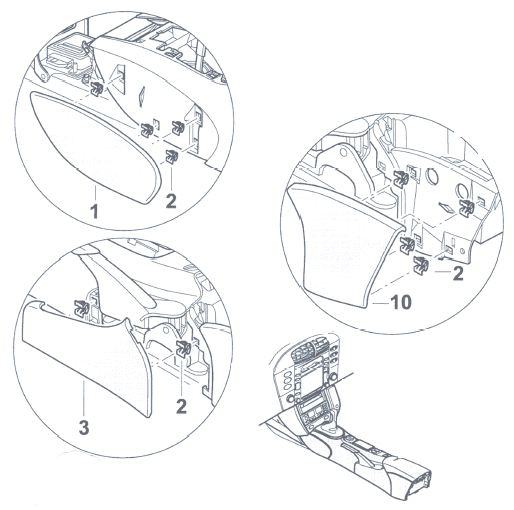
| Replacing Center Console - continued |
|---|
 | | |
| No. | Procedure | Instructions |
|---|
| 1 | Cover, rear left | Fasten -10- into place using clips -2-. |
| 2 | Cover, center left (hand brake) | Fasten -3- into place using clips -2-. |
| 3 | Cover, front right | Fasten the front right cover using clips. |
| 4 | Cover, front left | Fasten the front left cover -1- into place using clips -2-. |
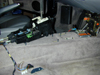
Install Passenger Under Dash Panel
Install the black molded panel from under the passenger dash by tightening the two plastic retaining screws with a regular screwdriver.
 Tip: This is a good opportunity to vacuum up all the foreign matter that you can't normally reach with the seats installed.
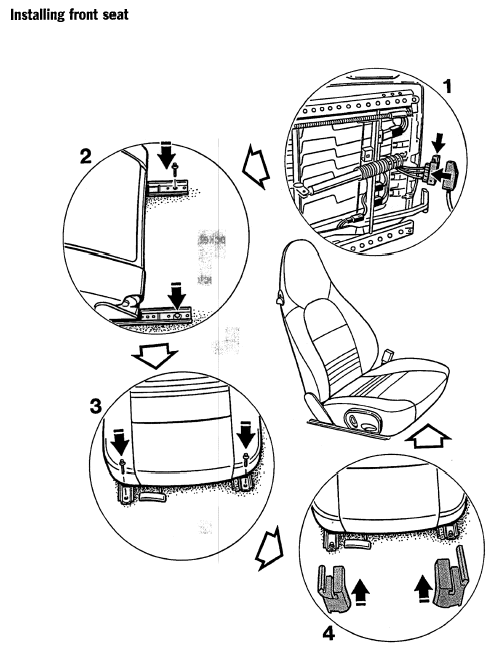
| Installing front seat |
|---|
 | | |
| No. | Procedure | Instructions |
|---|
| 1 | Connecting electrical plug connection. | Join the plug connection; press in plug connector locking device on the side. |
| 2 | Fitting seat screws at rear. | Position seat rails on the seat baseframe, screw the rear M10 x 28 Torx screws into the seat baseframe on the left and right using the E 12 socket wrench insert and tighten; tightening torque;: 65 Nm (48 ftlb.). |
| 3 | Fitting seat screws at front. | Move seat to its rear limit position, screw the front M10 x 28 Torx screws into the seat baseframe on the left and right using the E 12 socket wrench insert and tighten; tightening torque;: 65 Nm (48 ftlb.). |
| 4 | Fitting seat rail cover. | Push seat rail cover into front end of the left and right seat rails until the seat rail cover engages. |
| Note: You may be able to undo the Torx screws using a 10mm wrench. You do risk stripping the heads of these bolts (999.141.038.07) which cost about $4.00 each to replace. |
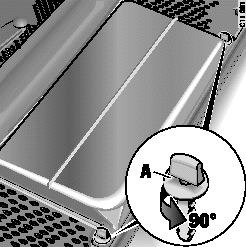
| Connecting the Battery |
|---|
 | | |
| No. | Procedure | Instructions |
|---|
| 1 | Disconnect the battery | Connect the negative (-) ground wire, by tightening the terminal clamp with a 10mm wrench. |
| 2 | Replace cover over the battery | The battery is located in the front luggage compartment under a black plastic lid. Replace plastic lid. Tighten turn locks -A-. |
Note: After disconnecting the battery, you should be aware of the following:
- It's been reported that disconnecting the battery on cars with low fuel (i.e. less than quarter tank) may cause the fuel gauge to display incorrectly.
- Vehicles with the additional equipment M 536 (alarm siren with tilt sensor) must be disconnected with the ignition on in order to avoid triggering the alarm siren.
- If you disconnect the battery with the ignition on it may cause your airbag warning lamp to illuminate, requiring a trip to the service department to reset.
- You may lose fault memories of vehicle control modules.
- The limit positions of the power windows are deleted from the control module when the battery is disconnected. To remedy, manually close each power window as far as it will go, then press the rocker switch for closing the window again.
- The theft-protection code of the Radio and PCM navigation system must be entered again in order to function.
